How to change Computer name and workgroup name (settings) in Windows 7?
To change Computer name, domain, and/or Work-Group settings in Windows-7, please open the "System Properties"! Use this solution for Win-7, Server 2008 and 2012!
1.) Open the Settings Computer Name and Workgroup!
Open the "System" start the "RUN" in Windows-7 with keys [Win-Logo]+[R]
Enter in the Address-Bar: "%systemroot%\system32\control.exe /name Microsoft.System" and press ENTER.
Start via start menu: » "Start", » » "Control Panel", » [ ] "System and Security", » » "System"
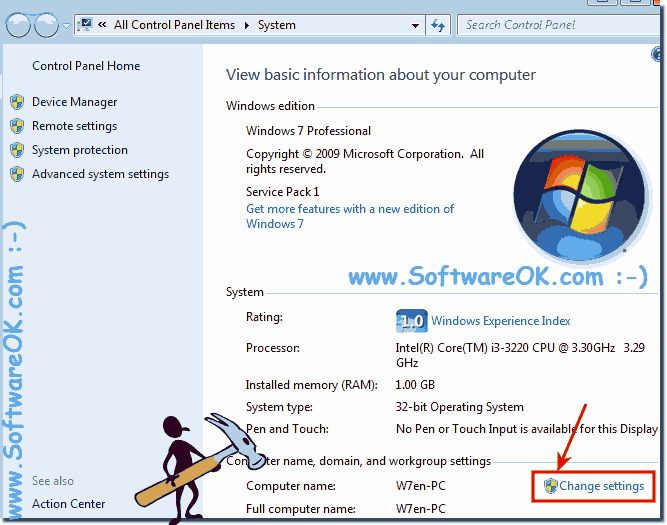
In the Win-7 "System" click in the Group "Computer name and workgroup settings" (see Image-1) and now click the text (link) "Change settings"
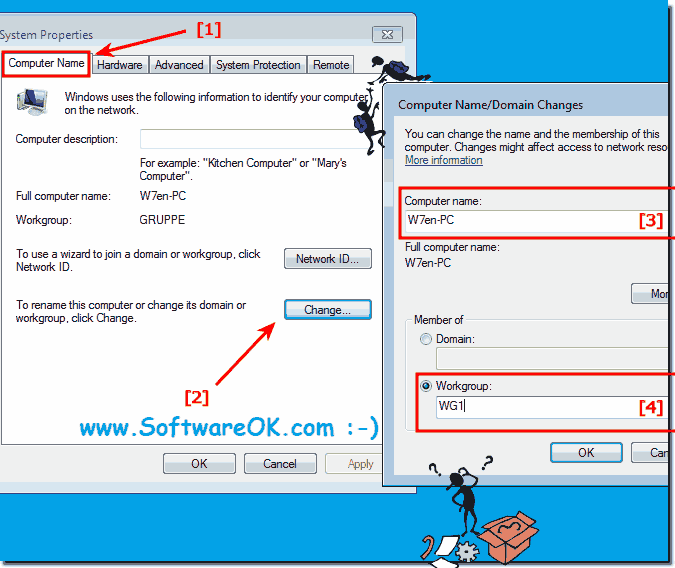
In the "System Properties" (see Image-2) click the button "Change". In "Computer Name/Domain Changes" you
can change the name and the membership of this computer.
Image-1: Change Computer name, domain, and/or workgroup settings in Windows-7!
You can view a summary of important information about your computer by opening System in Control Panel. You can see basic hardware information, such as your computer's name and you can change important system settings by clicking the links in the left pane of System.
2.) Change the Computer Name and Workgroup!
Image-2: windows-7 computer name and workgroup settings!
Changes might affect access to network resources!
Windows Workgroups supply a basis for file and printer sharing access, but do not actually set up sharing for you. In contrast, in Windows you can create or connect to a homegroup, which auto-turns on file and printer sharing on home networks. If have a windows home network, it is recommend to creating or joining to a homegroup.
Use the Windows-7 Disk Management to perform disk-related tasks such as creating and formatting partitions and volumes. 1. Open the "Computer Management"
To change settings of the Remote Desktop in Windows-7, 8 or 8.1, please open the "System Properties" tab "Remote" 1. Start the "Run command" in Windows-7
To temporarily enable or disable aero transparency via desktop shortcut in Windows 7, create "Aero Transparency Shortcut" Image-1 New Shortcut on the Windows-7
To disable auto expand folder in Windows 7 Explorer open and chainge the folder setting. Start the Windows-7 Explorer with keys [Win-Logo]+[E]. In Windows-7
Start the Windows-7 Explorer with keys [Win-Logo]+[E]. In Windows-7 Explorer press key [Alt]+[E] in the Menu-Bar can you see "Invert Selection" and "Select
This website does not store personal data. However, third-party providers are used to display ads, which are managed by Google and comply with the IAB Transparency and Consent Framework (IAB-TCF). The CMP ID is 300 and can be individually customized at the bottom of the page. more Infos & Privacy Policy ....

 "Start", » »
  "Control Panel", » [ ] "System and Security", » »
  "System"