The fastest way to change Windows 10 auto-update settings is through the system settings!
The ability to completely disable automatic updates is not provided in any of the editions. Windows 10 Home users have no control over the upgrade when updating security updates. It's different in Windows 10 Pro!
Content:
1.) ... Opening the Windows 10 Auto-Update Settings!
2.) ... Uninstall Windows 10 Auto Update!
1.) Opening the Windows 10 Auto-Update Settings!
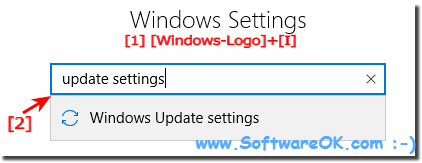
Simply use the keyboard shortcut Windows-Logo + I and enter the text update to adjust the auto-update settings! (... see Image-1 Point 1 and 2)In Windows 10 the update of the system has changed, the possibility to adapt automatic updates is limited. The settings in Windows depend on the Windows 10 version.
| (Image-1) Windows 10 update settings! |
 |
Automatic updating, a very important part of the operating system, and regular installation of autoupdates, patches, security updates, make Windows 10 more secure and stable. At least the user can postpone the reboot, in the Windows 10 Pro version it is possible to set some update settings, or set the schedule and postpone the installation of updates, the exception being the security upgrades. However, the user should decide for himself when and which updates will be installed. Or be able to disable them completely, without automatic checking.
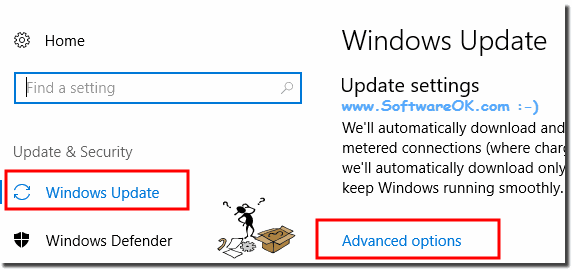
| (Image-2) Advanced options for Windows 10 updates! |
 |
2.) Uninstall Windows 10 Auto Update!
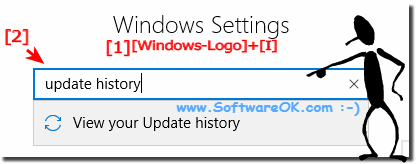
Open the Update history in Windows 10 Windows logo + I and enter in search box Update history!(... see Image-3)
| (Image-3) Windows 10 update History! |
 |
| (Image-4) Uninstall Windows 10 update! |
 |
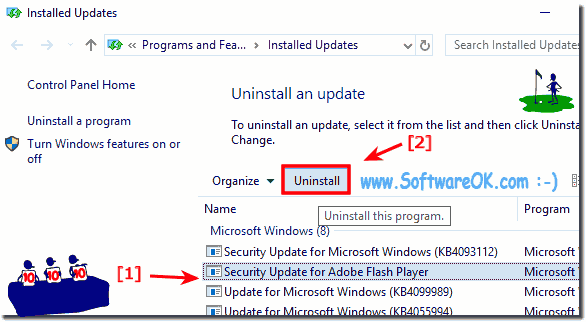
And just remove the unwanted auto updates in Windows 10, or rather uninstall!
Click the Uninstall Button
| (Image-5) Remove Windows 10 Installed Updates! |
 |
